Containerize a Spring Boot app with Docker and Maven Plugin
In this guide, we will create a fairly simple Spring Boot app and dockerize it using dockerfile-maven-plugin. You might be rightfully asking what are the reasons to do so and I’ll list a few reasons below.
- If you push your Docker Image to Docker Hub, everyone who’s got Docker installed can easily run your app with a couple of docker commands;
- If you’re developing an app using microservices, you can easily spin off (and turn down) different services that you might depend on. Let’s suppose a different team is working on a service that your microservice depends on. You can easily pull the image and run their service locally.
What we will build
Just as a simple example, we will create a Spring Boot project and just add an index page to test whether the project is running fine or not. Then, we’ll go ahead and create a Dockerfile and add the docker maven plugin to the project. Last but not least, we will learn how to build this docker image using maven and how to push it do Docker Hub.
This project is also available on my github, in case you’d like to check it out.
Building the Project
First we will go to start.spring.io and create a project with the following configuration:
- Project: Maven Project
- Language: Java
- Spring Boot: 2.3.2
- Project Metadata:
- Group: com.deriklima
- Artifact: demo-docker-maven
- Name: demo-docker-maven
- Description: Demo project for Spring Boot with Docker
- Project name: com.deriklima.demodockermaven
- Packaging: Jar
- Java: 14
The only dependency we will need is Spring Web. Your configuration should look like this:
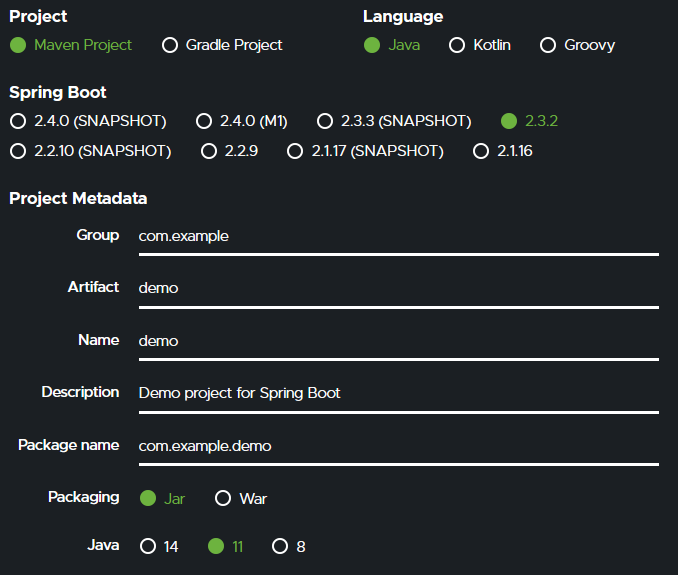
Spring Initializr First Page Configs
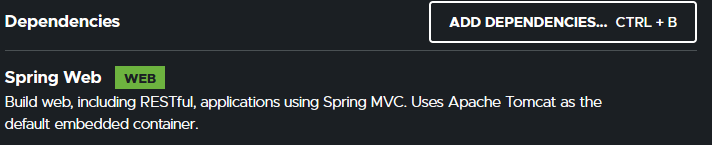
Spring Initializr Second Page Configs
With the project created, you can import it to your IDE of preference and create an extremely simple index page in resources/static/templates, like below:
<!DOCTYPE html>
<html lang="en">
<head>
  <meta charset="UTF-8">
  <title>Welcome Page</title>
</head>
<body>
<h1>Welcome to my Page!</h1>
</body>
</html>
Just remember to call the file “index.html”.
Following that, let’s create a Controller to actually maps the root path to our index.html page. As we’re creating a very simple and small web application, I’m gonna use the DemoDockerMavenApplication class, which was created by Spring Initializr, to declare our Controller. Just bear in mind that this is not a good practice and I’m mixing two completely different responsibilities in the same class, but I’m keeping it simple in this tutorial because this is not the main subject.
package com.deriklima.demodockermaven;

import org.springframework.boot.SpringApplication;
import org.springframework.boot.autoconfigure.SpringBootApplication;
import org.springframework.stereotype.Controller;
import org.springframework.web.bind.annotation.RequestMapping;

@SpringBootApplication
@Controller
public class DemoDockerMavenApplication {

  @RequestMapping("/")
  public String index() {
    return "index";
  }

  public static void main(String[] args) {
    SpringApplication.run(DemoDockerMavenApplication.class, args);
  }

}
As you can see, we added a @Controller annotation to the class, and declared a @RequestMapping, mapping the root path (”/”) to the index.html page. Just a reminder that you only need to return “index” not “index.html”. The “html” suffix is gonna be added by the Template Processor which is automatically configured by Spring Boot when you add the Web dependency.
Creating a Dockerfile
Now we need to create a Dockerfile for this project so that we can create a Docker Image and actually run this project using Docker. This Dockerfile needs to be in the root folder of the project and contains the following
FROM openjdk:14-buster
MAINTAINER Derik Lima <me@deriklima.com>

ENTRYPOINT ["java", "-jar", "/usr/share/demo-docker-maven/demo.jar"]

ADD target/lib /usr/share/demo-docker-maven/lib

ARG JAR_FILE
ADD target/${JAR_FILE} /usr/share/demo-docker-maven/demo.jar
The first like declares which image we want to base our Dockerfile on, which is, in this case, a openjdk 14 image. It’s important to keep the consistency here. When I created the project, I asked Spring Initializr to create a Java 14 project, so now I need to use a Java 14 image from Docker in order to run it properly.
The second line just declares the maintainer. It’s not important for a simple project like this one, but it’s a must have if you plan to develop a big public project.
The third line is an important one. An ENTRYPOINT defines what happens when you run a docker image, which in our case, we just want to run the our Spring Boot project. You might have noticed that we are running the jar in a specific directory. We’re creating this directory and moving the jar files (and dependencies) in the following lines, from 6 to 9.
Docker Maven Plugin Configuration
The plugin configuration is fairly simple. The first 4 lines are basic declarations like groupId, artifactId and version. Beware I’m using a variable to set the plugin version. Soon I’ll show a complete version of the pom.xml file and you will be able to see how it’s declared.
Then, in the lines number 5-13 we configure the executions, which basically will tell maven that when you run mvn package, it will also build the image, and when you run mvn deploy, it will also push the image to Docker Hub.
Lines 14-20, we configure the plugin. First, we set our repository, which is usually a combination of our Docker Hub username, with the project name. In this case, my docker hub username is derikjl and the project name is demo-docker-maven so that’s why I have the repository set to “derikj/demo-docker-maven”. We could apply some good practices here by using variables instead. You can create a variable within the properties tag in maven with your docker hub user name and use the variable project.artifactId, from maven, to fetch your project’s name. In this case, your repository configuration would look like this: <repository>${dockerhub.username}/${project.artifactId}. But I’ll leave it up to you.
<plugin>
  <groupId>com.spotify</groupId>
  <artifactId>dockerfile-maven-plugin</artifactId>
  <version>${dockerfile-maven-version}</version>
  <executions>
    <execution>
      <id>default</id>
      <goals>
        <goal>build</goal>
        <goal>push</goal>
      </goals>
    </execution>
  </executions>
  <configuration>
    <repository>derikjl/demo-docker-maven</repository>
    <tag>${project.version}</tag>
    <buildArgs>
      <JAR_FILE>${project.build.finalName}.jar</JAR_FILE>
    </buildArgs>
  </configuration>
</plugin>
Here you can see how a final version of the pom.xml file would look like:
<?xml version="1.0" encoding="UTF-8"?>
<project xmlns="http://maven.apache.org/POM/4.0.0"
  xmlns:xsi="http://www.w3.org/2001/XMLSchema-instance"
  xsi:schemaLocation="http://maven.apache.org/POM/4.0.0 https://maven.apache.org/xsd/maven-4.0.0.xsd">
  <modelVersion>4.0.0</modelVersion>
  <parent>
    <groupId>org.springframework.boot</groupId>
    <artifactId>spring-boot-starter-parent</artifactId>
    <version>2.3.2.RELEASE</version>
    <relativePath/> <!-- lookup parent from repository -->
  </parent>
  <groupId>com.deriklima</groupId>
  <artifactId>demo-docker-maven</artifactId>
  <version>0.0.1-SNAPSHOT</version>
  <name>demo-docker-maven</name>
  <description>Demo project for Spring Boot</description>

  <properties>
    <java.version>14</java.version>

    <dockerfile-maven-version>1.4.13</dockerfile-maven-version>
  </properties>

  <dependencies>
    <dependency>
      <groupId>org.springframework.boot</groupId>
      <artifactId>spring-boot-starter-web</artifactId>
    </dependency>
    <dependency>
      <groupId>org.springframework.boot</groupId>
      <artifactId>spring-boot-starter-test</artifactId>
      <scope>test</scope>
      <exclusions>
        <exclusion>
          <groupId>org.junit.vintage</groupId>
          <artifactId>junit-vintage-engine</artifactId>
        </exclusion>
      </exclusions>
    </dependency>
  </dependencies>

  <build>
    <plugins>

      <plugin>
        <groupId>org.springframework.boot</groupId>
        <artifactId>spring-boot-maven-plugin</artifactId>
      </plugin>

      <!-- Copy Maven dependencies into target/lib/ -->
      <plugin>
        <artifactId>maven-dependency-plugin</artifactId>
        <executions>
          <execution>
            <phase>initialize</phase>
            <goals>
              <goal>copy-dependencies</goal>
            </goals>
            <configuration>
              <overWriteReleases>false</overWriteReleases>
              <includeScope>runtime</includeScope>
              <outputDirectory>${project.build.directory}/lib</outputDirectory>
            </configuration>
          </execution>
        </executions>
      </plugin>

      <plugin>
        <groupId>com.spotify</groupId>
        <artifactId>dockerfile-maven-plugin</artifactId>
        <version>${dockerfile-maven-version}</version>
        <executions>
          <execution>
            <id>default</id>
            <goals>
              <goal>build</goal>
              <goal>push</goal>
            </goals>
          </execution>
        </executions>
        <configuration>
          <repository>derikjl/demo-docker-maven</repository>
          <tag>${project.version}</tag>
          <buildArgs>
            <JAR_FILE>${project.build.finalName}.jar</JAR_FILE>
          </buildArgs>
        </configuration>
      </plugin>
    </plugins>
  </build>

</project>
Building the Image
The image is built automatically every time you run mvn package. But if you want to only build the image, you need the following command:
mvn dockerfile:buildPushing the Image
Every time you run mvn deploy, your image is automatically pushed to Docker Hub (your docker hub credentials need to be configured), but if you want to just push it without running the deploy command, you need to run the following command:
mvn dockerfile:pushRunning the Image
Now you can run the image locally on the port 8080 by executing the following command:
docker run --name demo-docker-maven -p 8080:8080 derikjl/demo-docker-maven:0.0.1-SNAPSHOTJust remember to adapt the command to your scenario.
That’s all I had for this one. It’s a simple tutorial just teaching the basics of containerize/dockerize a Spring Boot application. Again, you can check it out on my github.
Let me know if you have any problems.